728x90
반응형
SMALL
안녕하세요.
오늘은 javascript를 이용해 동적으로 Dialog Modal을 만들어 보도록 할게요.
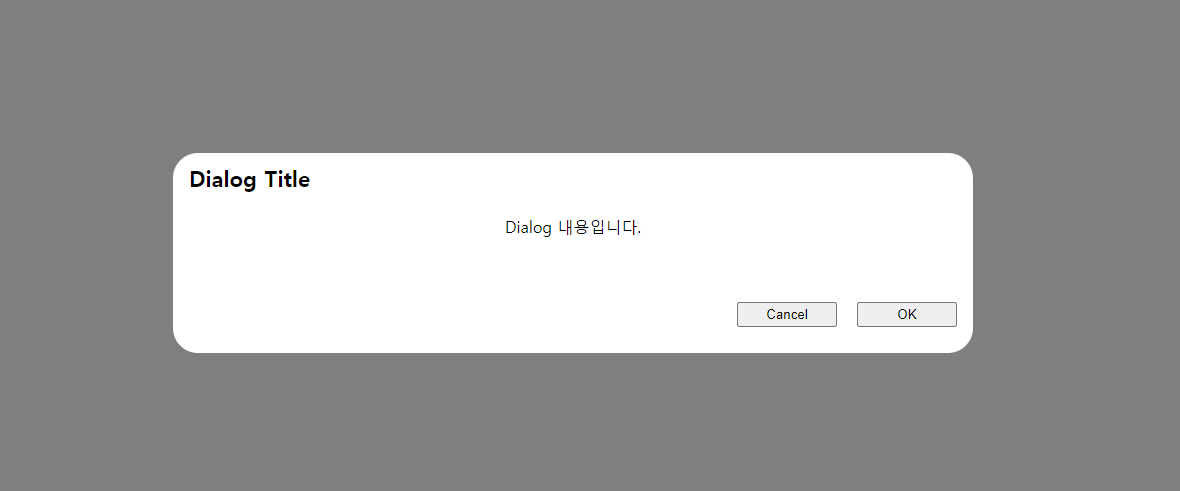
화면 중앙에 Dialog Modal 버튼을 만들고 버튼을 클릭하면 Dialog Modal 생성 후 Cancel 버튼을 눌러
Dialog Modal을 다시 제거하도록 했습니다.
우선 아래와 같이 버튼을 만듭니다.

<body>
<button onclick="showDialog()">Dialog Modal</button>
</body>
버튼을 클릭하면 showDialog 함수를 호출하고 함수해서 html 을 동적으로 body에 넣어 Dialog Modal을 표현합니다.

<div class="dialog">
    <div class="dialog__inner">
        <h1>Dialog Title</h1>
        <p>Dialog 내용입니다.</p>
        <div class="dialog__btn__wrap">
            <button id="cancel">Cancel</button>
            <button id="ok">OK</button>
        </div>
    </div>
</div>
위에 Dialog Modal HTML 코드를 Javascript에서 String 으로 만들고 DOMParser().parseFromString() 함수를 사용해
String DOM으로 변환합니다.
변환된 DOM을 통해 dialog 클래스 찾아 document.body.appendChild() 함수를 통해 body에 붙여줍니다.
cancel, ok 버튼을 클릭하면 document.body.removeChild() 함수를 통해 Dialog Modal를 제거합니다.
const showDialog = () => {

    const _html = `
        <div class="dialog">
            <div class="dialog__inner">
                <h1>Dialog Title</h1>
                <p>Dialog 내용입니다.</p>
                <div class="dialog__btn__wrap">
                    <button id="cancel">Cancel</button>
                    <button id="ok">OK</button>
                </div>
            </div>
        </div>
`

    const dom = new DOMParser().parseFromString(_html, 'text/html');
    const dialog = dom.querySelector(".dialog");
    document.body.appendChild(dialog)

    dialog.querySelector("#cancel").addEventListener("click", () => {
        document.body.removeChild(dialog)
    })

    dialog.querySelector("#ok").addEventListener("click", () => {
        // 로직 처리
        alert("OK");
        document.body.removeChild(dialog)
    })
}
각 버튼을 querySelector로 찾아 addEventListener('click') 을 통해 버튼 클릭을 조작할 수 있습니다.
전체코드
<!DOCTYPE html>
<html lang="en">
<head>
    <meta charset="UTF-8">
    <title>Title</title>
</head>
<style>
    *, *:before, *:after {
        padding: 0;
        margin: 0;
        box-sizing: border-box;
    }

    body {
        display: flex;
        align-items: center;
        justify-content: center;
        width: 100vw;
        height: 100vh;
    }

    .dialog {
        width: 100vw;
        height: 100vh;
        position: fixed;
        left: 0;
        top: 0;
        background: rgba(0, 0, 0, .5);
        display: flex;
        align-items: center;
        justify-content: center;
    }

    .dialog__inner {
        width: 800px;
        height: 200px;
        background: white;
        padding: 10px 16px;
        border-radius: 25px;
    }

    .dialog__inner h1 {
        font-size: 22px;
    }

    .dialog__inner p {
        text-align: center;
        height: 70px;
        line-height: 70px;
    }

    .dialog__btn__wrap {
        display: flex;
        align-items: center;
        justify-content: flex-end;
        gap: 20px;
        margin-top: 40px;
    }

    .dialog__btn__wrap button {
        width: 100px;
        height: 25px;
    }

</style>
<body>
<button onclick="showDialog()">Dialog Modal</button>
</body>

<script>

    const showDialog = () => {

        const _html = `
            <div class="dialog">
                <div class="dialog__inner">
                    <h1>Dialog Title</h1>
                    <p>Dialog 내용입니다.</p>
                    <div class="dialog__btn__wrap">
                        <button id="cancel">Cancel</button>
                        <button id="ok">OK</button>
                    </div>
                </div>
            </div>
    `

        const dom = new DOMParser().parseFromString(_html, 'text/html');
        const dialog = dom.querySelector(".dialog");
        document.body.appendChild(dialog)

        dialog.querySelector("#cancel").addEventListener("click", () => {
            document.body.removeChild(dialog)
        })

        dialog.querySelector("#ok").addEventListener("click", () => {
            // 로직 처리
            alert("OK");
            document.body.removeChild(dialog)
        })
    }


</script>

</html>
위 코드를 통해 html을 만들어 동적으로 Dialog Modal을 만들어 Body에 추가/삭제하여 팔요에 따라 Dialog Modal을 사용 할 수 있습니다.
728x90
반응형
LIST
'dev > web' 카테고리의 다른 글
| [NEXT] 프로젝트 생성하기 - 01 (3) | 2023.09.21 |
|---|---|
| Google 3rd Party oAuth2 device 구현하기 (6) | 2022.07.21 |
| jquery csv파일로 export 하기 (18) | 2021.01.21 |
| php 500 에러코드 출력 (6) | 2021.01.18 |
| Window 에서 Apache + PHP+ Mysql WebServer 만들기 3부 MySql 편 (14) | 2021.01.10 |